-
 Operating Instructions
-
Hardware Function
-
Software Function
HelloX Toturials
-
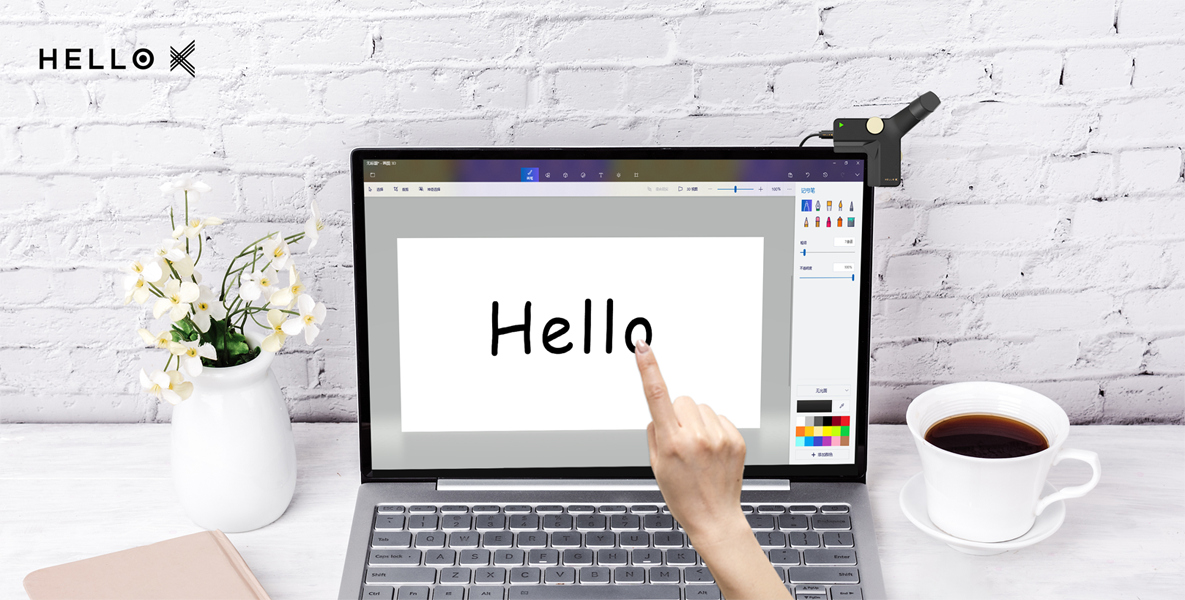
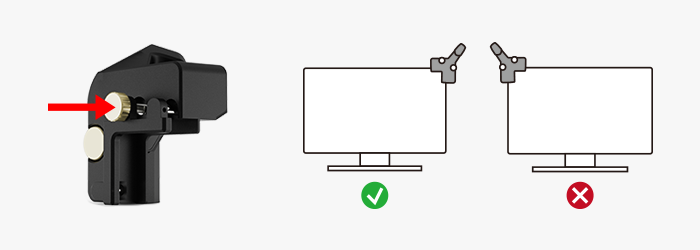
Operating Instructions1. Installing HelloX2 to upper right corner of the monitor
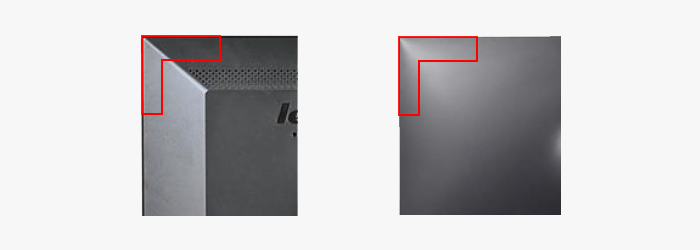
Unscrew the knob on the back of HelloX, clamp HelloX to the upper right corner of the display, and tighten the knob
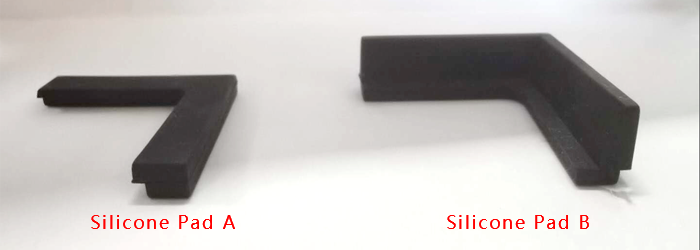
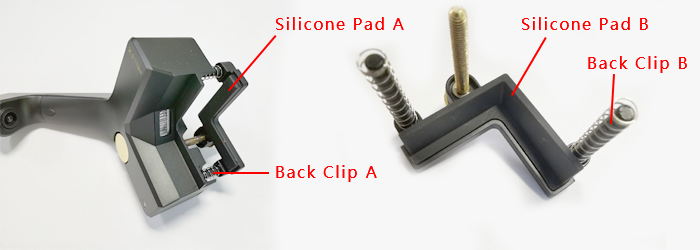
(1)Silicone pad A is suitable for installing the monitor with a flat back at HelloX
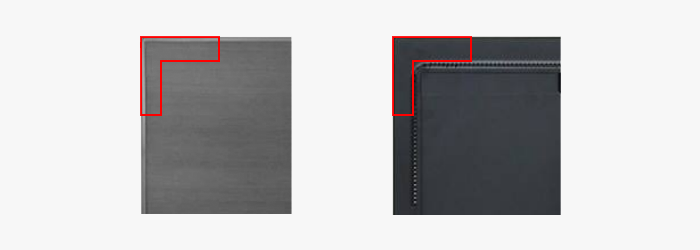
(2)Silicone pad B is suitable for installing the monitor with a special-shaped back at HelloX
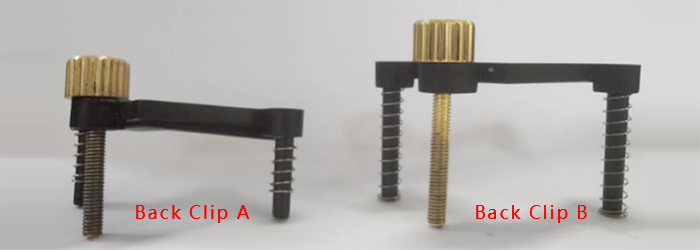
- (1)Back Clip A + Silicone Pad A: Suitable for monitors with a thickness of 4.5-18mm
- (2)Back Clip A + Silicone Pad B: Suitable for monitors with a thickness of 1-12.5mm
- (3)Back clip B + silicone pad A: suitable for monitors with a thickness of 13.5-28mm
- (4)Back Clip B + Silicone Pad B: Suitable for monitors with a thickness of 8-21mm
- Note: Back clip A and silicone pad A are installed on HelloX by default. Back clip B and silicone pad B are packaged together separately. Remove the silicone pad from the back clip for free combination
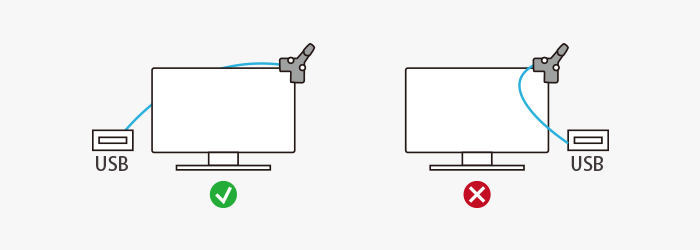
 2. Connecting HelloX2 to the computer with a USB cable
If the computer does not have a USB interface, please use an interface converter; put the USB cable behind the screen and do not block the screen
 3. Adjustment
Enter the adjustment page in the menu and strictly follow the steps of the calibration page
4. CalibrationEnter the calibration page in the menu and only one finger can touch the screen during calibration,long press the calibration circle, and do not click quickly
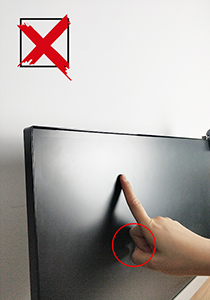
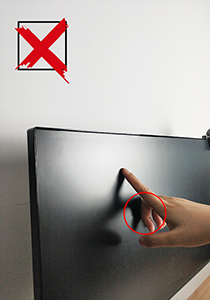
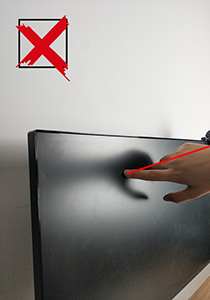
5.Precautions for touch- (1)Use the correct touch-screen posture
- (2)Avoid using under sunlight or infrared light
- (3)It supports the touch screen of cylindrical objects with diffuse reflection surfaces(like fingers), such as gloves, wooden sticks, chopsticks, paint brushes, etc., but not guaranteed to be used normally
- (4)It is recommended to use a indicator with parallel front and back panels. Bending may cause the touch screen insensitive
- (5)Don't support curved monitor
- (6)Don't support indicators with a border higher than 4mm
- (7)The silicone pad can adapt some special indicator monitors with special borders, but can not compatible with all situations
- (8)Don't place other items beside the monitor
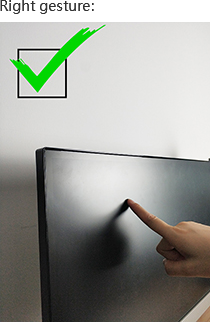
Wrong gesture:
-
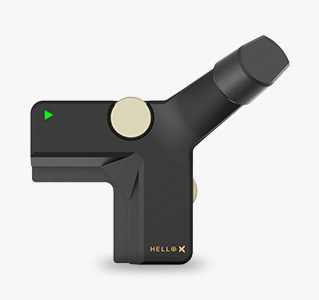
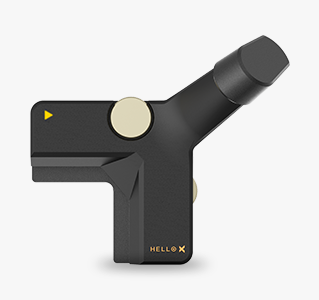
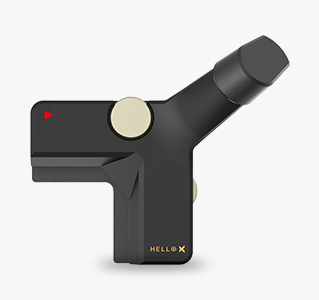
Hardware Function1. Indicator
(1)Green light: indicates HelloX is in normal operation status
(2)Yellow light: indicates HelloX is in sleep status. It can be awakened by clicking the wake up button in the menu
(3)Red light: indicates HelloX is in disabled status (the software is not calibrated or operating).
 2. Silicone Pad
(1)Silicone pad A is suitable for installing the monitor with a flat back at HelloX
(2)Silicone pad B is suitable for installing the monitor with a special-shaped back at HelloX
3. Back Clip
- (1)Back Clip A + Silicone Pad A: Suitable for monitors with a thickness of 4.5-18mm
- (2)Back Clip A + Silicone Pad B: Suitable for monitors with a thickness of 1-12.5mm
- (3)Back clip B + silicone pad A: suitable for monitors with a thickness of 13.5-28mm
- (4)Back Clip B + Silicone Pad B: Suitable for monitors with a thickness of 8-21mm
- Note: Back clip A and silicone pad A are installed on HelloX by default. Back clip B and silicone pad B are packaged together separately. Remove the silicone pad from the back clip for free combination
4. DetectorThe detector is used to adjust, and it needs to face HelloX during adjustment. The detector is powered by a battery. If the battery is low, please replace the 3V button battery

Methods to replace the battery:
-
Software Function
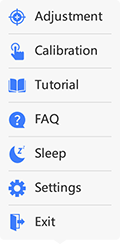
Right-click the tray icon,wake up the menu
 1. System Tray1.1 Entrance
Open the hidden tray option
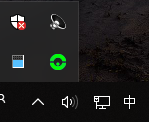
Directly display on the tray
 1.2 Icon instructions
-
 Normal state: touch can be used normally
-
 Sleep state: HelloX is sleeping
-
 Disabled state: HelloX is not connected without calibration for touch screen
-
 Error state: installation files are missing or damaged, you need to restall the software
1.3 Status InformationMove the mouse pointer to the tray, getting the current software status information
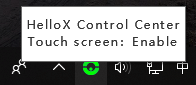 Status description:
- (1)Enable: normal use
- (2)Disconnect: pull out HelloX
- (3)Disable: the function is disabled
- (4)Power saving: AI power saving takes effect
- (5)Sleep: the function has slept
- (6)Uncalibrated: touch screen uncalibrated
2. Notice2.1 HelloX connectedThe software successfully connects with HelloX
2.2 HelloX disconnectedSoftware disconnects from HelloX
Note: if the software frequently reminds HelloX disconnected and connected, please replace the USB port and reconnect. If the problem can't be solved, please seek customer support
2.3 HelloX go into sleepHelloX go into sleep, the function is suspended, the tray manually wake up or touch HelloX indicator to continue the operation
2.4 HelloX function is abnormalHelloX self-check found that the function is abnormal, please download the latest installation package to install
Note: some security software (such as: QQ housekeeper, jinshan poison bully, etc.) may prevent the normal installation during the installation. If this problem occurs, please first suspend the operation of the security software and install HelloX again
2.5 HelloX is upgradableAfter the auto update of settings is turned on,this information will be prompted when the update is detected.Please download the updated software from settings page or official website to enjoy the latest experience
2.6 Touch screen calibration is abnormalBefore touch screen if the calibration process is abnormal, please choose to re-calibrate in the tray menu
Note: abnormal calibration will affect the normal operation of touch screen
3. Adjustment(1)If it is the first time you use HelloX, you must perform adjustment,and strictly follow the steps from adjustment page
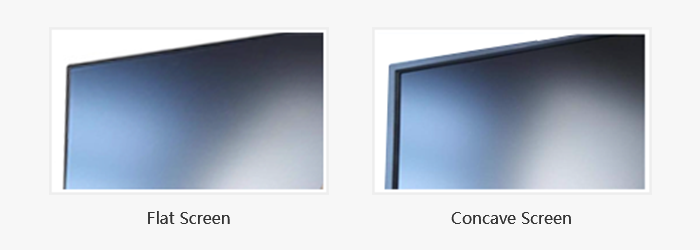
(2) The monitor adjustment method of [Flat Screen] and [Concave Screen] is different. Please select the correct frame type in [Settings_Advanced Settings], and then recalibrate
(3)After adjustment, please do not move HelloX. If HelloX is moved, you need to readjust and recalibrate
 4. Calibration
(1)If it is the first time you use HelloX, you must perform calibration (after adjustment); each time you readjust, you need to perform calibration again
(2)When calibrating, only one finger can touch the screen and long press the calibration circle; pay attention to the finger to align the center of the calibration circle
(3)If the calibration is unsuccessful, please go to [Settings_Advanced Settings] to check whether the screen type and screen size are correct. If it is wrong, modify it correctly. Then perform adjustment & calibration again
5. ToturialsOpen HelloX tutorial page
6. FAQOpen HelloXFAQ page
7. Sleep / WakeSleep/Wake HelloX(Touch will not be available after HelloX sleeps)
8. Settings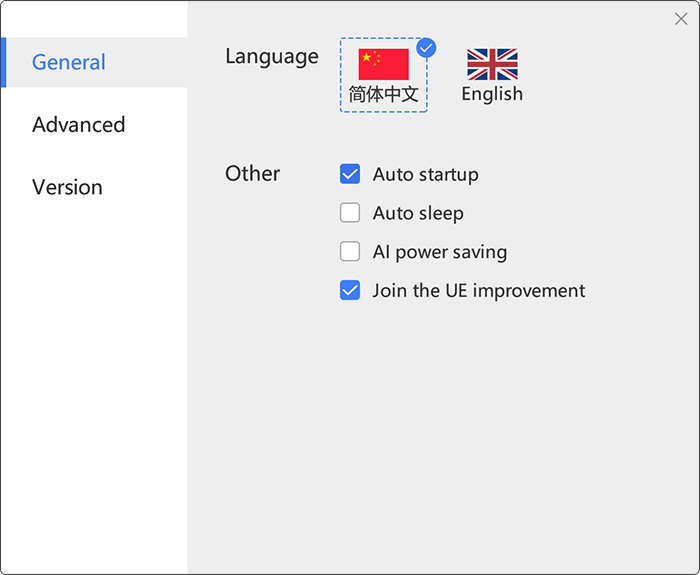
 8.1 Language
Select the desired language to switch
8.2 Auto startupAuto Start HelloX after operating system starts
8.3 Auto sleepNo touch operation within 1 hour, the software and HelloX go into sleep
8.4 AI power savingHelloX intelligent learning user habits, no operation in a limited time,it will enter power-saving mode, effectively reduce the occupancy rate of the program
8.5 Participate in the user experience improvement programHelp us improve the product by collecting only the operation information of HelloX
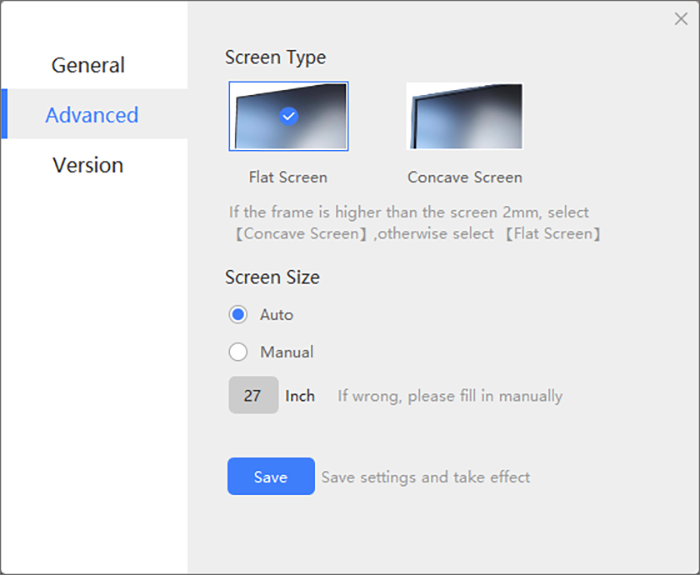
8.6 Screen Type(1)Flat Screen: the frame and the screen are on the same plane
(2)Concave Screen: the monitor manufacturer will design the frame to be slightly higher than the screen surface to protect the screen
Note: The adjustment method is related to the screen type; Please select the correct option; after modification, you need to click the [Save Settings] button to restart the software to take effect
 8.7 Screen Size
(1)Automatic acquisition: the software automatically acquires the screen size
(2)Manual filling: If you find that there is an error between the automatically obtained screen size value and the actual value, you can choose to manually fill in and it depends on the screen type
Note: The touch precision effect is related to the screen size. Please fill in the correct value; after modification, you need to click the [Save Settings] button to restart the software to take effect
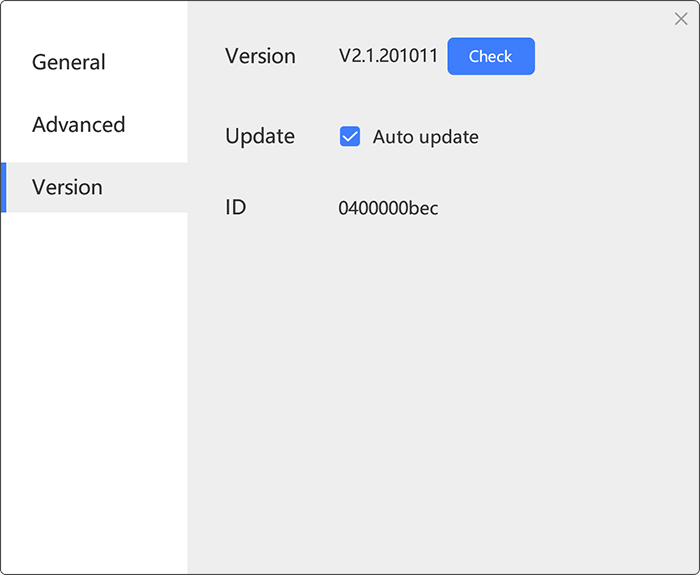
8.8 Software VersionIndicated current software version number
8.9 Update CheckingManually detection of software version update status
8.10 Auto updateAutomatic detection of software version update status
8.11 IDTouch will not be available after exiting the software
9. ExitTouch will not be available after exiting the software
-